After about five tries I have managed to "perfect" my Abercrombie & Fitch project to the best of my abilities. I just hope it will be good enough for my interview with Sports Direct on Friday. I have managed to work my style around A&F and believe that I do bring my own design handwriting through my designs and illustrations.
Wednesday, 23 March 2011
abercrombie & fitch
Labels:
Abercrombie and Fitch,
illustration,
inspiration,
portfolio
Sunday, 20 March 2011
prints
I have been uber busy this week designing my prints for digital printing. It is so stressful trying to manipulate designs so that they look fresh and original. I have also been very busy last week arranging pattern pieces to send for laser cutting. All in all I spent £400 just last week buying fabrics for printing, leather for laser cutting and the postage. It is absolutely insane where my money is going nowadays. Should hopefully be worth every penny come show day.
Here are my patterns to be digitally printed so far. I will be putting up screen shots as it is easier than saving jpeg files right now!
The above blank spaces will be filled with traditional shisha (mirror) embroidery but instead of mirrors I will be using flexible flat back sequins to avoid adding extra weight to the fabric as this will be printed at a length of 2 meters to cover the front and the back of my t-shirt.
I love this think. The bright lime colour of the faces and the yellow give this print a very summery feel.
I am definitely having second thoughts about the above chilli print I do not feel that it is a as strong as the first chilli print. Any suggestions?
Here are my patterns to be digitally printed so far. I will be putting up screen shots as it is easier than saving jpeg files right now!
The above blank spaces will be filled with traditional shisha (mirror) embroidery but instead of mirrors I will be using flexible flat back sequins to avoid adding extra weight to the fabric as this will be printed at a length of 2 meters to cover the front and the back of my t-shirt.
I love this think. The bright lime colour of the faces and the yellow give this print a very summery feel.
I am definitely having second thoughts about the above chilli print I do not feel that it is a as strong as the first chilli print. Any suggestions?
Tuesday, 15 March 2011
laser cutting express
I am so happy to have finally got my pattern for my laser cutting pieces going. As simple as the shapes are I will be introducing a separate pattern piece under my laser cut sleeve to have another sleeve underneath. The underneath will be hand printed using procion printing onto satin silk and will show my colour off very vibrantly which is the effect I am going for.
These images are of me working on Illustrator to achieve my pattern. The blue lines going through the images are the ruler guides for all you who do not use illustrator very often or at all!
complementary collection
For my complementary collection, to go along side my garment lengths and fronts I am designing a small range of scarves. Most of today I have spent trying to develop my portfolio pages for this collection and finally I am very happy with the progression of this. Below I have attached some images of my portfolio pages for this collection.
I know that it looks like I have used every single possible colour in my colour palette but I do assure you that for my final scarves I will be cutting down on the amount of colours, even though the majority are tonal colours.
Labels:
geometry,
illustration,
inspiration,
portfolio,
scarves
Wednesday, 9 March 2011
final project
I started to experiment further with my designs yesterday. Only just having time as I am trying to keep up with my portfolio at the same time. The images below are of my work and of my messy work space! Just thought that I would share this delight with all my readers! :)
The above image has been digitally printed onto silk twill. Such a luxurious fabric texture. I have then used another screen to print adhesive glue onto the black hair and the red lips.
Using flock the sample went under the heatpress for 20 seconds for the glue to adhere to it and this was my result. I am very happy with this result apart from some minute areas not getting the coverage I wanted like the face on the left hand side. Her lips have too much coverage. However that can be sorted with some beading or some fancy stitching!
My next five samples include cut out work onto leather. Here I have used polyester leather to just give an effect of what I want to achieve at a larger scale. The tracing paper attached to the piece of fabric is for me to know where I need to cut.
This is what it looks like so far!!
Juts one page from my sketchbook to give you a brief idea of what I am doing right now.
Last but not least some images of my messy, messy desk! :)
The above image has been digitally printed onto silk twill. Such a luxurious fabric texture. I have then used another screen to print adhesive glue onto the black hair and the red lips.
Using flock the sample went under the heatpress for 20 seconds for the glue to adhere to it and this was my result. I am very happy with this result apart from some minute areas not getting the coverage I wanted like the face on the left hand side. Her lips have too much coverage. However that can be sorted with some beading or some fancy stitching!
My next five samples include cut out work onto leather. Here I have used polyester leather to just give an effect of what I want to achieve at a larger scale. The tracing paper attached to the piece of fabric is for me to know where I need to cut.
This is what it looks like so far!!
Juts one page from my sketchbook to give you a brief idea of what I am doing right now.
Last but not least some images of my messy, messy desk! :)
Sunday, 6 March 2011
coincidence continued...
Remind you of something???
weird right...? Looks like halftone is very in this season, meaning I am bang on trend!
diy nut
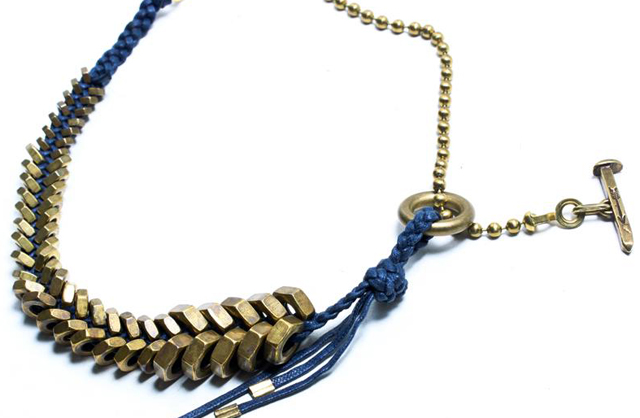
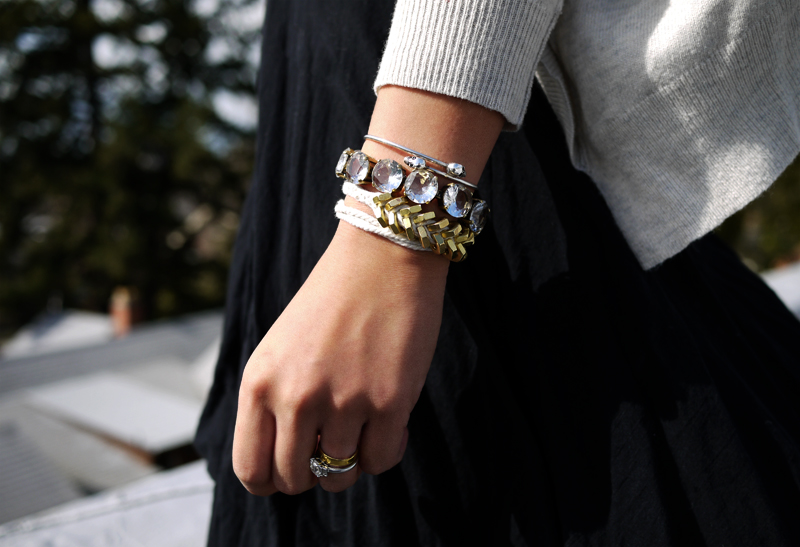
I found a really interestingly fabulous d.i.y tutorial on http://honestlywtf.com/ about how to make a very inexpensive but superb looking Braided Hex Nut Bracelet. The original idea comes from the Giles & Brother collection http://www.gilesandbrother.com/collections/womens-classic/products/short-braided-hex-necklace
The idea of being able to make you own for under £10 is so inspiring. So why not make one for yourself and your friends?
You will need 3 strands of twine cut into one yard pieces, 18 small brass hex nuts (although you can use any size, maybe even use graduating sizes?) and last but not least some patience.
Gather the 3 strands of twine and tie them in a knot at the top, leaving about 2 inches of slack for when tying. Start braiding and once you reach an inch down from the braiding start threading in the hex nuts. Before you braid the far left strand over the middle strand, thread on a nut, push it against the base of the braid, and crossover. Depending on the thickness of the twine, you can wrap tape around the bottom tips to prevent the twine from fraying. (click on the images for a larger view)
Keeping your thumb at the base of the braid, hold the nut in its place. Before you braid the far right strand over the middle, thread on another nut, push it against the base of the braid and crossover. Again, hold your thumb tightly against the base of the braid, keeping the nuts in place. Thread another nut onto the far left piece and crossover.
Repeat the steps, by threading the rest of the nuts to the outer pieces of twine before they are crossed over. Thread, cross, thread, cross. Finish the bracelet with another inch of braided twine and a knot.
The bracelet should wrap around your wrist at least two or three times. Trim it to your liking.
Enjoy!!
You will need 3 strands of twine cut into one yard pieces, 18 small brass hex nuts (although you can use any size, maybe even use graduating sizes?) and last but not least some patience.
Gather the 3 strands of twine and tie them in a knot at the top, leaving about 2 inches of slack for when tying. Start braiding and once you reach an inch down from the braiding start threading in the hex nuts. Before you braid the far left strand over the middle strand, thread on a nut, push it against the base of the braid, and crossover. Depending on the thickness of the twine, you can wrap tape around the bottom tips to prevent the twine from fraying. (click on the images for a larger view)
Keeping your thumb at the base of the braid, hold the nut in its place. Before you braid the far right strand over the middle, thread on another nut, push it against the base of the braid and crossover. Again, hold your thumb tightly against the base of the braid, keeping the nuts in place. Thread another nut onto the far left piece and crossover.
Repeat the steps, by threading the rest of the nuts to the outer pieces of twine before they are crossed over. Thread, cross, thread, cross. Finish the bracelet with another inch of braided twine and a knot.
The bracelet should wrap around your wrist at least two or three times. Trim it to your liking.
Enjoy!!
Subscribe to:
Posts (Atom)